Rotational Organization

The following is a glimpse into the mind of Nicole Uno (IG @unotraining).


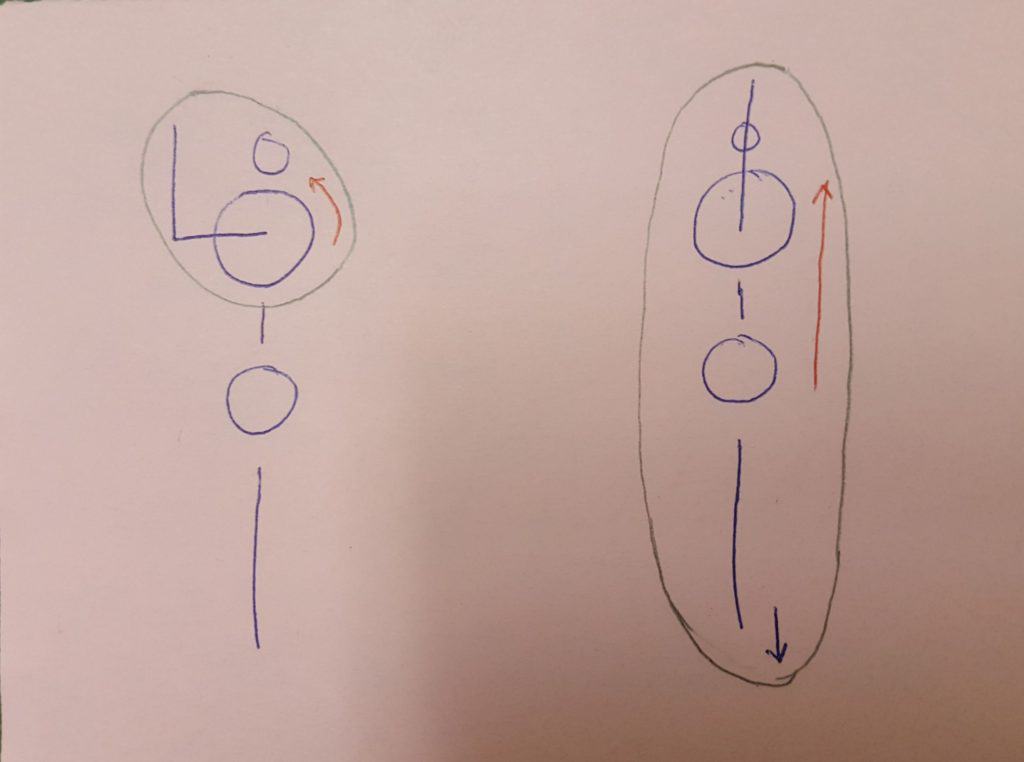
Rotational Organization allows for the simultaneous existence between contract and relax.  Thoroughly simplified, consider two gears.  There is an impetus of force and a corresponding area of relaxation that transmits an easy, fluid movement.  If both attempt to be the driver, it would create slack in the chain:

The goal of rotational organization is create and keep length.


View this post on Instagram


A simple exercise with a variety of focal points to one’s choosing… – Creating internal space, as the external space is decreased. – Controlling center of gravity through a range of movement. – Shoulder rotation through straight arm pressing/support position, (which I for some reason like to think of as an armpit hinge). – Contrast between a body/movement that is rigid, to one that is nimble. – Etc.. Notably not mentioning this as a drill for mobility or strength, as I think these words are often misleading without context, in that they are qualities built from experiencing the movements in relation to one’s own body. What is supposed to be a strength exercise, won’t necessarily be a strength exercise for everyone. This hints toward the ‘bigger picture‘ thought – it seems that often we want to start with what we want to have (or are supposed to want), instead of starting with what we actually have. We must be able to distinguish our own body from the crowd. Strength and mobility have to be built upon something consistent, right?

A post shared by UNO Training (@unotraining) on

Anchoring the feet to ground and not letting them slide lets maintains the space to transfer movement and re-position parts in between.


Anchoring refers to the hands and/or feet locking into a surface.  Stable pieces will be driven downward, creating an axis which the rest of the body (or respective parts) can swivel around:


View this post on Instagram


The role of the ‘free arm’, through rotation. The armpit anchor and leading with the opposing elbow. Preparatory/basics. Hips to feet are still. Checking on energy transfer through the torso and comparing rotational ability side to side. Clip 1- maintaining protracted scap and actively pulling a small weight plate across the top of a box (to keep level, for the sake of awareness). Relaxed elbow (and hands). Clip 2- now comparing a simultaneous push-pull through the scapula, elbow lead. My current application. Clip 3- from kneel, anchor armpit to floor. Free scap stacks over the loaded, should help to reduce pressing load of other by pulling (through elbow lead), and ‘unwinding’ from the position naturally. Push-pull across scapula. Clip 4- same as above but advancing, from seated into side plank with forward reach. Clip 5- future visions; incorporating into bent arm work/elbow levers with balance. Clip 6- standing to demonstrate the ‘unwinding’ sensation with elbow as the ‘tipping point’ in leading the movement, but only if energy is transferred correctly through the body. Comparing side to side has been productive with this one.

A post shared by UNO Training (@unotraining) on

First the feet and then the single arm drive downward to express rotational motion.  Armpit anchors push throughout, either into the ground or to lead the opposing elbow.


Vertical alignment of the system effects pulls as well as pushes.  Vertical forearms transformed chin ups from an impossible task to an easy and accessible one.  I had assumed supinated grip pulls were easier because of bicep strength, but the reality was that when my palms faced behind me my elbows pointed straight down.  Hands reversed, they tended to jut out at the sides at about 30-degrees.  The wrong angles created slack in the system and made my parts work independent of one another.  Forearms aligned with the direction of the pull, it acted more like a literal pulley, with the joints of the shoulder organizing around the fixed point of the wrist instead of getting caught in the elbow.

Similarly, when climbing, one can hang vertically and ‘rest’ when their lines of tension and gravity are aligned.  (Just as one can ‘stand’ with very little effort if their joints are stacked over their center).  Tension in the elbows leads to unnecessary strain.  It adds another cog to the pulley that establishes excessive tightness through particular parts of the chain.  Preserving space between the hands and armpits leaves the elbows free to thread in any direction necessary, and most easily transition between push and pull.

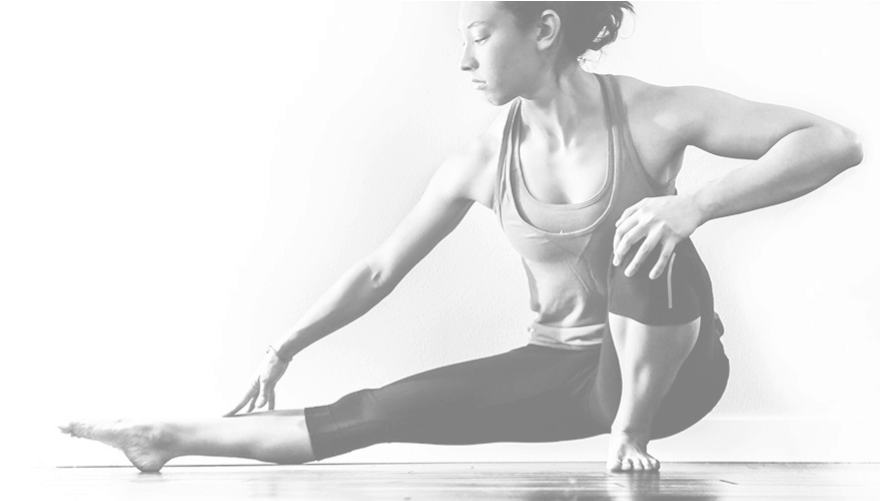
Here Nicole examines an equivalent relationship between hips and feet, prioritizing sequence and pressing downward:


View this post on Instagram


Hip rotation as a lead. Keep length between opposing big toes. Hip rotation will initiate and allow the pelvis to be pushed/pulled but always ‘opening’ toward the destination. With the legs extended away, one must solve the puzzle of connecting leg to hip and hip to body/integrate a piece into the whole. This would serve as a means to transition through movement. A thought on application/body integration. Such as in rock climbing, a toe may be used to ‘pull’ the hip, and therefore body close into the wall. The point being to obtain control of the center of gravity. Clip 1 – from hanging. This helps to exaggerate the slight stretch through the middle, which is helpful in gaining body control and finding this particular line of tension. Spiral. Clip 2 – from the floor. This first snippet is slow for body sensation and ease of control- a base for producing various movements. The next snippet is one such variation which is momentum based and the refusal to let my Bgirl dreams die 😉 Air flairs coming up next.. Clip 3 – using a prop. Sequencing the right rotation here creates an easy way to sit up.

A post shared by UNO Training (@unotraining) on


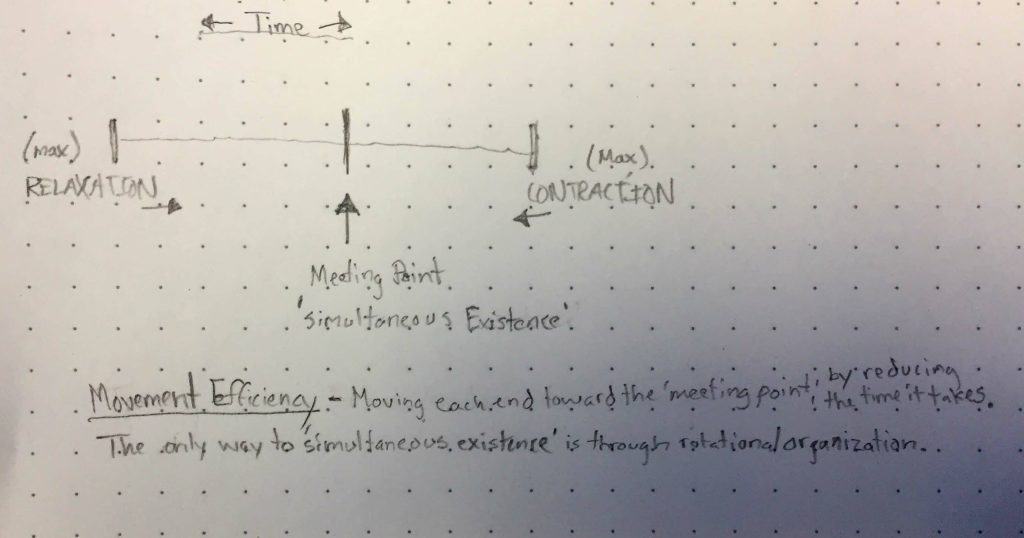
A timing element permeates everything.  The contract-relax and push-pull relationship must be sychronized to simultaneously exist.  Too much of either upsets the balance and trends the system to behave more toward an extreme.  Again, the tension between parts and lines must precisely fit the movement and adjust accordingly as the needs of the movement change:


Finally, rotation functions as a stabilizer.   It readies for movement and also moves.  Arches, forearm/ shin torque, knee/elbow pivots, and ball and socket joints all account for steadfast anchoring and organizational rotation to absorb load and transmit force:


View this post on Instagram


Rotational organization in the creation of the ‘hand arch’. When standing, and rotating the hip outward, while also trying to keep the big toe in contact with the ground, an arch along the inside of the foot will hopefully appear. Same is the case with the shoulder and the hand arch. A slight press into the ground with the spread hand, and an outward turn of the arm initiated with the ‘armpit’, and a slight arch in the first knuckle of the index finger should appear. For me this creates a nice internal webbing of the hand feeling, and what’s even more exciting is being able to use this small arch to create stability in positions where the hand must take a lot of body weight. (Bonus, it also allows a greater range through the wrist via fingers)… I like to think of arches as small air pockets for stability, helping to support various positions. Akin to an internal method of stability production, the Valsalva maneuver… yawn. (Hah). To help with this concept of rotational organization, I visualize it as a way to create space in the joint for movement. Clip 1 – Floor work: my rotation between the two points (hand-shoulder). Front and side view. Clip 2 – Hanging: to create palm arch, the pulling through fingers is moved primarily into the outer two, and the palm pulls slightly away from the bar, to allow the wrist and (outside of the) forearm to align (for rotation) in pulling. (Thumbs should be able to move around freely). Side-ish view and also from behind for rotation in pulling. Progressing: Clip 3 – Begin by building familiarity- exaggerating the contrast and transition between the fingers (first knuckle) and palm. Same as before but with hands flat- this time noticing the lines of tension in the arm.. First knuckle tends to pull the body forward, palm tends to push the body back. Adding forward lean (loading more body weight) to the hand arch- use the arch to push the body back through the arm, while allowing the fingers to pull the body forward. A symbiotic contrast. Also, very similar to the press handstand, (only shoulder rotation changes).

A post shared by UNO Training (@unotraining) on


Edit:  Two months later, as this concept swirled around in my mind, I got my chin over the bar with shocking ease and a full picture visual came into mind.  Consider the stiff bar that connected two old-timey railroad wheels:


I always stopped short from getting my chin over bar (usually stalling at eyes or a reaching nose) because I only looped around the rib cage.  This forced my head and thorax to rotate forward and collapse, leaving my lower body unattached and posteriorly tilting to compensate.  (I looked like a parenthesis.)  If I were to get and maintain length from the start, the lats and glenohumeral joint letting the body fully sink, I loop the entire body (more wheels) on the pull and the downward force on the elbows shoots the stiff lever up.  Getting height becomes easy because there is no rotation off the vertical line.


Leave a Reply

Your email address will not be published. Required fields are marked *